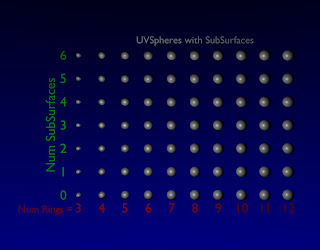
This is a shell that will be expended in the future. It simplifies the problem of setting up an image in Blender. Other postings will build examples on top of this module.
For now, it is recommended to place this file in C:\tmp. I'll use that location in example scripts. A future release will have a more permanent recommended home.
Code:
Download Code for the Origami Library 0.001.
This file can be placed arbitrarily. Any script which imports this module must reference it by the full path because of how Blender handles files.
#!BPY
__doc__ = """
OLib_xxxx.py
Rev 0.001
This module setups up a scene for static rendering, animation or game engine operation
This module provides useful library functions.

This module does nothing from the Blender command line

------------------
History:
rev 0.001 8/2/2009
   Initial release to test structure and functionality
 edt
"""

__author__ = "edt"
__version__ = "0.001 2009/08/03"
__url__="Website, dataOrigami.blogspot.com"
##############################################################

__doc__ = """
This module setups up a scene for static rendering, animation or game engine operation
This module imports useful library functions.

rev 0.001
   Initial release to test structure and functionality
 edt 8/2/2009
"""


import Blender
import Blender.Mathutils
from Blender.Mathutils import *

class Image(object):
 def __init__(self,name='Scene'):
  # create new scene
  scene = Blender.Scene.New(name)
  scene.makeCurrent()
  ##############################################################
  # add a camera and set it up
  #
  camdata = Blender.Camera.New()
  cam = scene.objects.new(camdata)
  # use setLocation to control the position of the camera
  scene.objects.camera = cam
  self.cam   = cam
  self._lookAt_x = 0
  self._lookAt_y = 0
  self._lookAt_z = 0
  self.lookFrom(2.481,-1.508,1.1)
  ##############################################################
  # add a lamp and set it up
  #
  lampData = Blender.Lamp.New()
  lampData.setEnergy(1.0)
  lampData.setType('Lamp')
  lampData.mode |= Blender.Lamp.Modes["RayShadow"]  # make shadows appear
  lamp = scene.objects.new(lampData)
  lamp.setLocation(2.0,2.0,5.0)
  lamp.setEuler(120*(3.1415/180),30*(3.1415/180),-30*(3.1415/180))
  #
  ################################################################
  # setup world
  world = Blender.World.New(name+'_World')
  world.setCurrent()


  self.scene = scene
  self.lamp  = lamp
  self.world = world

 def lookFrom(self,*args):
  if len(args)==1:
   # we have an object which contains look information
   x = args[0].x
   y = args[0].y
   z = args[0].z
  elif len(args)==3:
   # we have x,y,z coordinates
   x = args[0]
   y = args[1]
   z = args[2]
  # set camera position to x,y,z
  self.cam.setLocation(x,y,z)
  self.lookAt()

 def lookAt(self,*args):
  if len(args)==0:
   to_x = self._lookAt_x
   to_y = self._lookAt_y
   to_z = self._lookAt_z
   up_x = 0
   up_y = 1
   up_z = 0
  elif len(args)==1:
   # we have an object which contains look information
   to_x = args[0].x
   to_y = args[0].y
   to_z = args[0].z
   up_x = 0
   up_y = 1
   up_z = 0
  elif len(args)==2:
   # we have an object which contains look information
   to_x = args[0].x
   to_y = args[0].y
   to_z = args[0].z
   up_x = args[1].x
   up_y = args[1].y
   up_z = args[1].z
  elif len(args)==3:
   # we have x,y,z coordinates
   to_x = args[0]
   to_y = args[1]
   to_z = args[2]
   up_x = 0
   up_y = 1
   up_z = 0
  elif len(args)==6:
   # we have x,y,z coordinates
   to_x = args[0]
   to_y = args[1]
   to_z = args[2]
   up_x = args[3]
   up_y = args[4]
   up_z = args[5]
  # save view target
  self._lookAt_x = to_x
  self._lookAt_y = to_y
  self._lookAt_z = to_z
  # set camera position to x,y,z
  from_x, from_y, from_z = self.cam.getLocation()
  p1 = Vector([from_x,from_y,from_z])
  p2 = Vector([to_x,to_y,to_z])

  # form a vector that points in the direction from p1 to p2
  dir = p2-p1
  #print 'from='+str(p1)
  #print 'to='+str(p2)
  #print 'dir='+str(dir)

  dir.normalize()
  #u = dir
  up = Vector([up_x,up_y,up_z])
  up.normalize()
  dir_ref = Vector([0,0,-1.0])   # direction the camera naturally points w/o rotation
  if True: #abs(AngleBetweenVecs(dir,dir_ref))>1e-6:
   d = -dir
   e = up-up*DotVecs(dir,up)
   e.normalize()
   f = -CrossVecs(d,e)
   A = Matrix(
     [f[0],f[1],f[2],0],
     [e[0],e[1],e[2],0],
     [d[0],d[1],d[2],0],
     [from_x,from_y,from_z,1])
  else:
   # the direction of view is parallel to the z-axis
   A = Matrix(
     [1,0,0,0],
     [0,1,0,0],
     [0,0,1,0],
     [from_x,from_y,from_z,1])
  # apply the transform to the camera
  self.cam.setMatrix(A)

 def add(self,item,name='noName'):
  # this method allows any object to be added to the scene
  ob = self.scene.objects.new(item,name)
  return ob

 def delete(self,item):
  self.scene.objects.unlink(item)

 def addSphere(self,**kwargs):
  # default the values
  diameter = kwargs.get('diameter',1.0)
  segments = kwargs.get('segments',8)
  rings = kwargs.get('rings',8)
  loc   = kwargs.get('location',[0,0,0])
  useIco = kwargs.get('useIco',False)
  useUV = kwargs.get('useUV',True)
  subdivisions = kwargs.get('subdivisions',2)
  name = kwargs.get('name','sphere')
  if useIco:
   sphere = Blender.Mesh.Primitives.Icosphere(subdivisions,diameter)
  else:
   sphere = Blender.Mesh.Primitives.UVsphere(segments,rings,diameter)
  ob = self.add(sphere,name)
  ob.setLocation(loc)
  return ob

 def addCube(self,*kwargs):
  pass

 def addCylinder(self,**kwargs):
  pass

 def addPlane(self,**kwargs):
  pass

 def addText(self,**kwargs):
  loc   = kwargs.get('location',[0,0,0])
  name  = kwargs.get('name','sphere')
  txtStr= kwargs.get('text','Default Message')
  width = kwargs.get('width',1.0)
  height= kwargs.get('height',1.0)
  col   = kwargs.get('color',[1.0,1.0,1.0])
  align = kwargs.get('align','LEFT')
  txt = Blender.Text3d.New()
  txt.setText(txtStr)
  txt.setSize(0.1)
  alignDict = {'LEFT':Blender.Text3d.LEFT,'RIGHT':Blender.Text3d.RIGHT,
      'MIDDLE':Blender.Text3d.MIDDLE, 'FLUSH':Blender.Text3d.FLUSH}
  txt.setAlignment(alignDict[align])
  mat=Blender.Material.New('textMat')
  mat.rgbCol = col
  ob = self.add(txt)
  me = Blender.Mesh.New('textMesh')
  me.getFromObject(ob)
  me.materials += [mat]
  self.delete(ob)
  newOb = self.add(me,name)

  # force a redraw to ensure that the bounding box is updated!!
  Blender.Window.RedrawAll()
  boundBox = newOb.getBoundBox(1)
  upperBox = max(boundBox)
  lowerBox = min(boundBox)
  initialWidth = upperBox[0]-lowerBox[0]
  initialHeight = upperBox[1]-lowerBox[1]
  widthRatio = width/initialWidth
  heightRatio = height/initialHeight
  ratio = min(widthRatio,heightRatio)

  newOb.setSize(ratio,ratio,ratio)
  newOb.setLocation(loc)
  return newOb


 def addWorld(self,**kwargs):
  pass

 def drawNow(self,**kwargs):
  xSize = kwargs.get('xSize',1024)
  ySize = kwargs.get('ySize',800)
  overSampleLevel = kwargs.get('oversamplingLevel',16)
  #print 'Image.drawNow() executing'
  self.context = self.scene.getRenderingContext()
  # enable seperate window for rendering
  Blender.Scene.Render.EnableDispWin()
  self.context.imageType = Blender.Scene.Render.JPEG
  if overSampleLevel>0:
   self.context.enableOversampling(True)
   self.context.setOversamplingLevel(overSampleLevel)
  else:
   self.context.enableOversampling(False)
  self.context.imageSizeX(xSize)
  self.context.imageSizeY(ySize)
  # draw the image
  self.context.render()

 def save(self,filename='image.jpg'):
  self.drawNow()
  self.context.saveRenderedImage(filename)

class Animation(object):
 pass

class BEG(object):
 pass


# This does not work with Blender
#if name=='__main__':
# # test/demo codes here
# pass
To copy the code snippets easily, see:http://dataorigami.blogspot.com/2009/06/how-to-easily-copy-code-snippets-from.html
To execute the script in Blender, see:http://dataorigami.blogspot.com/2009/06/how-to-execute-script-from-command-line.html
To work with the script in a simple IDE, see:http://dataorigami.blogspot.com/2009/04/developing-scripts-for-blender.html


